版本: zabbix 3.2
一、server設定
1.安裝ssmtp、mailx
yum install ssmtp
yum install mailx
2.設定ssmtp
cp /etc/ssmtp/ssmtp.conf.bak
vim /etc/ssmtp/ssmtp.conf
==============================
[email protected] #寄件者地址
mailhub=smtp.gmail.com:587 #smtp伺服器
[email protected] #寄件者郵件帳號
AuthPass=password #寄件者郵件密碼
AuthPass=password #寄件者郵件密碼
hostname=junior-zabbix #主機名稱
UseTLS=YES #啟用安全加密連線
UseSTARTTLS=YES #啟用安全加密連線
UseSTARTTLS=YES #啟用安全加密連線
TLS_CA_File=/etc/pki/tls/certs/ca-bundle.crt
Debug=YES #輸出錯誤資訊
==============================
3.測試ssmtp使用G-Mail寄信
echo "This is a test" | ssmtp [email protected]
有收到信的話就可以進行下一步驟,
沒有收到信的狀況目前統計到兩種:
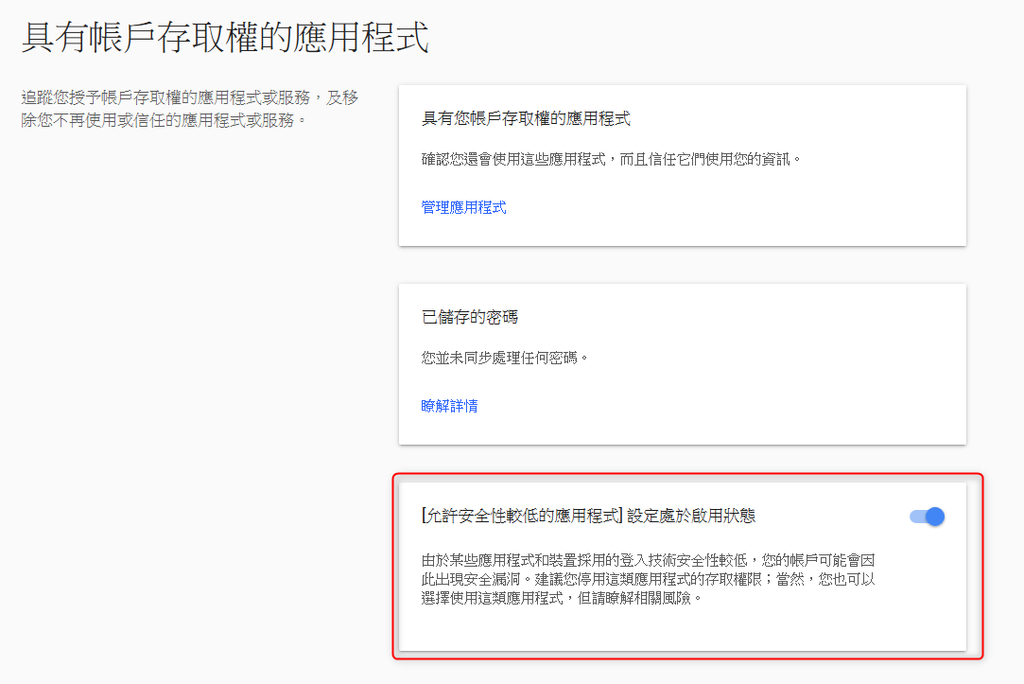
1.G-mail必須要開啟[我的帳戶]>[登入和安全性]>[允許安全性較低的應用程式]
2.你可能是用雲端的機器幫你送信,就算你脫光光,他們還是不會讓你寄信的,啾咪。
4.設定寄件腳本
使用G-mail寄信的話需設定腳本,腳本的資料夾位置在 /usr/lib/zabbix/alertscripts 底下(使用yum 安裝的情況下)
新增腳本 vim sendmail
================================
#!/bin/bash
to=$1
subject=$2
body=$3
cat <<EOF | mail -s "$subject" "$to"
$body
EOF
================================
chmod a+x sendmail
server設定到這邊告一段落
二、web設定
1.新增警報type
[Administration]>[Media types]>[Create media type]
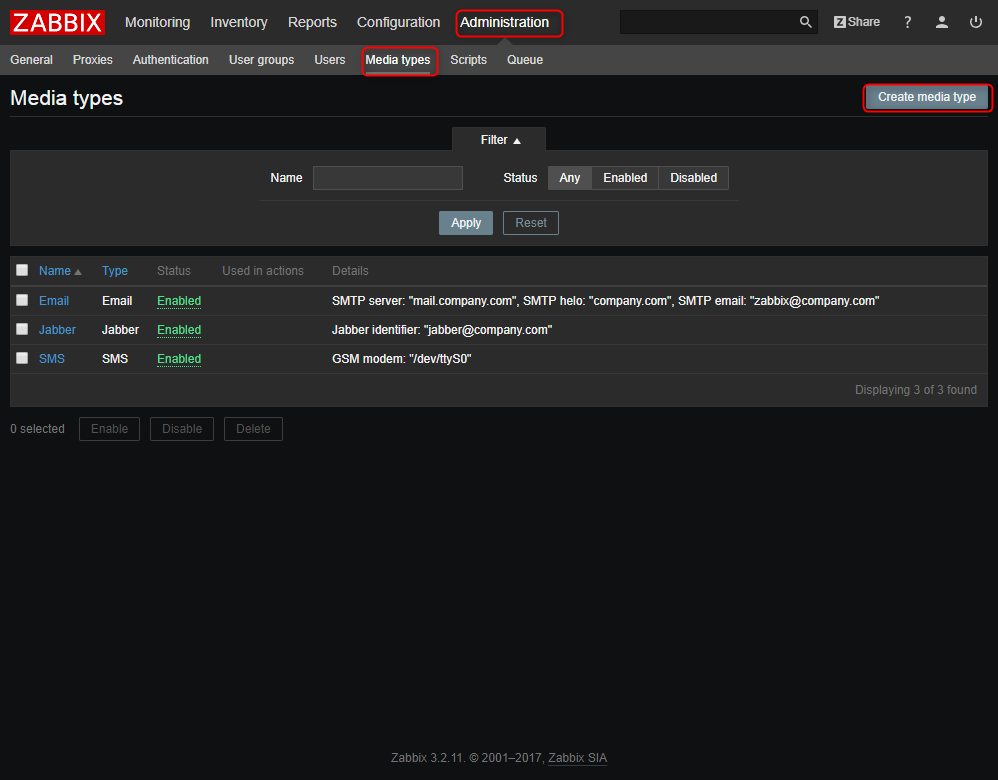
Name: 取個警報名子
Type: 選擇"Script"
Script name: 設定剛剛腳本的名子 sendmail
Script parameters: 新增3個參數: {ALERT.SENDTO}、{ALERT.SUBJECT}、{ALERT.MESSAGE}
2.設定警報跳出時執行的動作
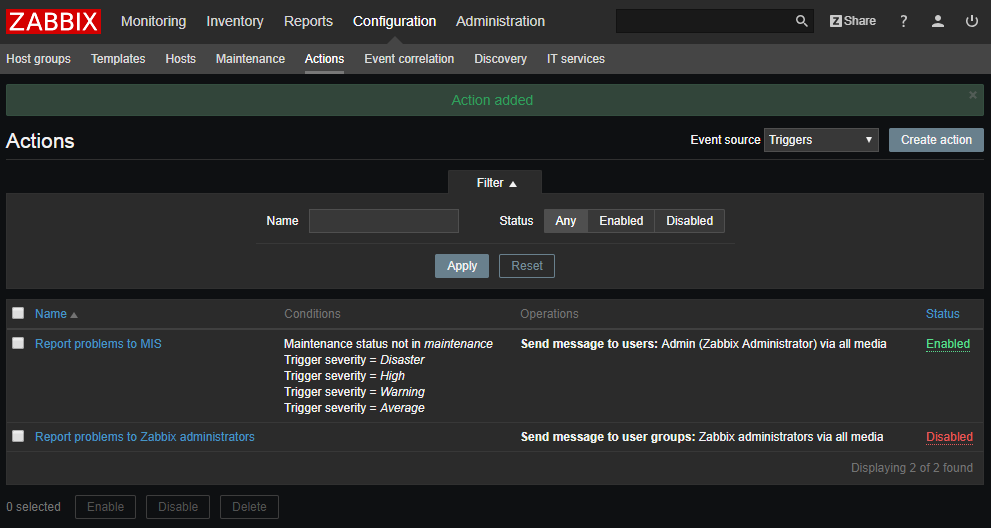
[Configuration]>[Actions]>[Create actions]
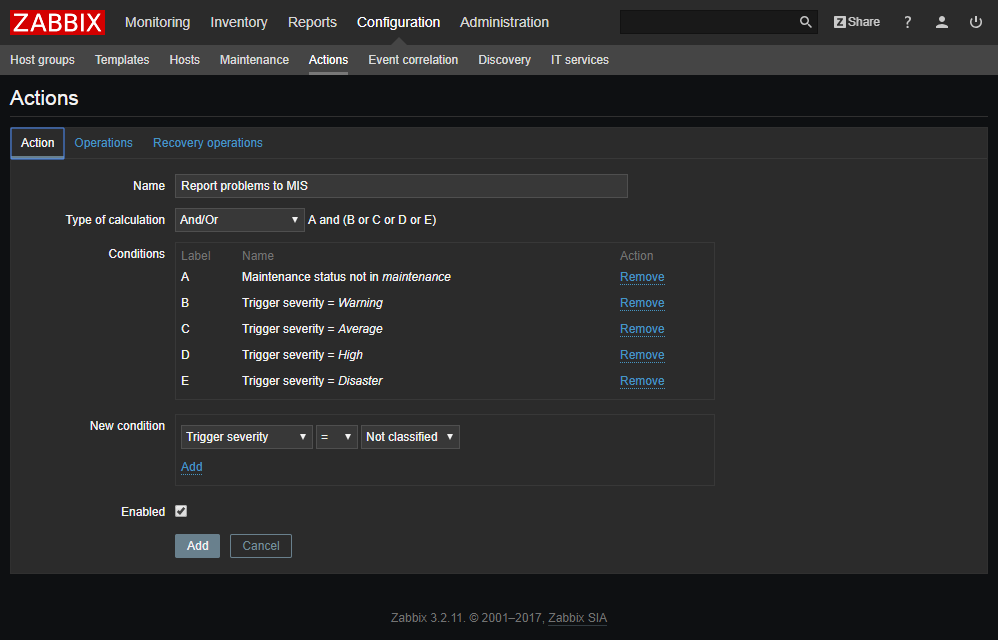
01.Action
Name : 自己取動作名稱
Conditions:觸發條件
New Conditions:設定新的觸發條件
以下設定新增觸發條件 Trigger severity = Warning、 Trigger severity = Average、 Trigger severity = High、 Trigger severity = Disaster
02.Operations
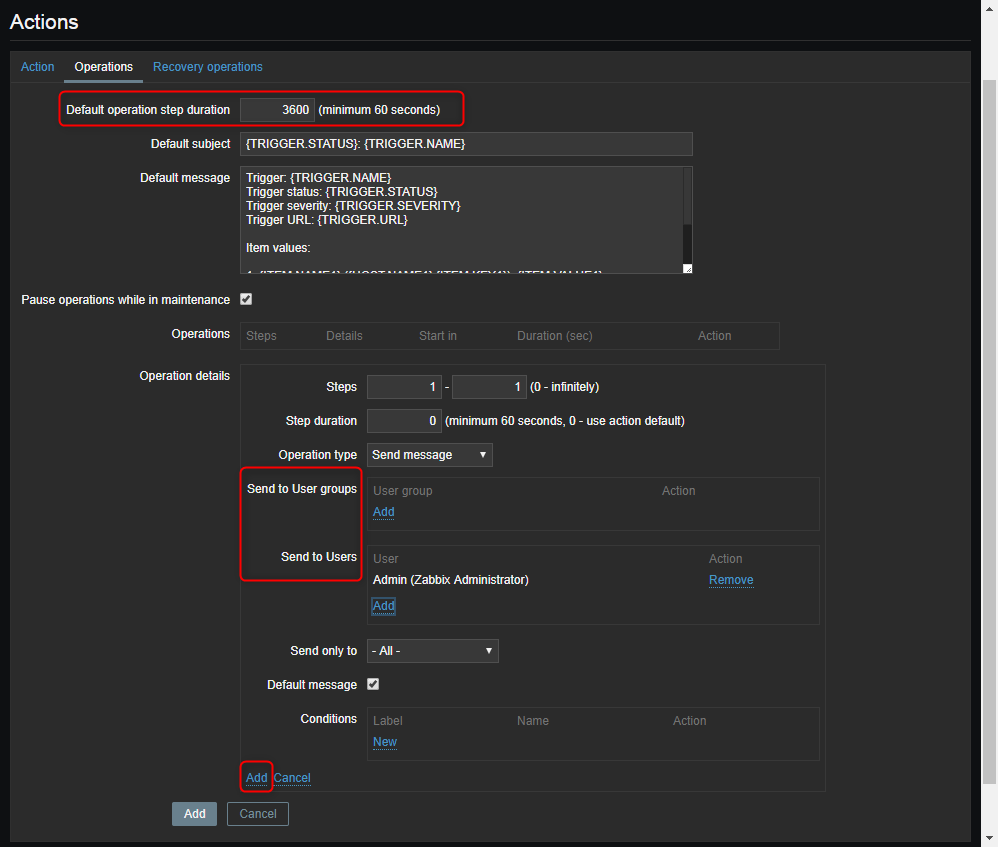
Default operation step duration: 執行一次操作後,須等待指定時間過後再執行下一個操作(比如每隔3600秒發一次警報)
Operations 設定動作new
Operation details 設定寄送給哪一個群組和使用者(注意:新增時點選Operation details的Add)
03.Recovery operations
設定Operation >Operation Type "Send recovery message" 點選add,最後再點選下方的add
3.設定使用者的Email
點選右上角的人頭像>Media> Add>輸入要收信的Email
Type:選擇剛剛新增的腳本名稱
Send to:輸入你的收信rmail
When active :設定收信時間
Use if severity: 設定接收的警報層級
設定好點選Add
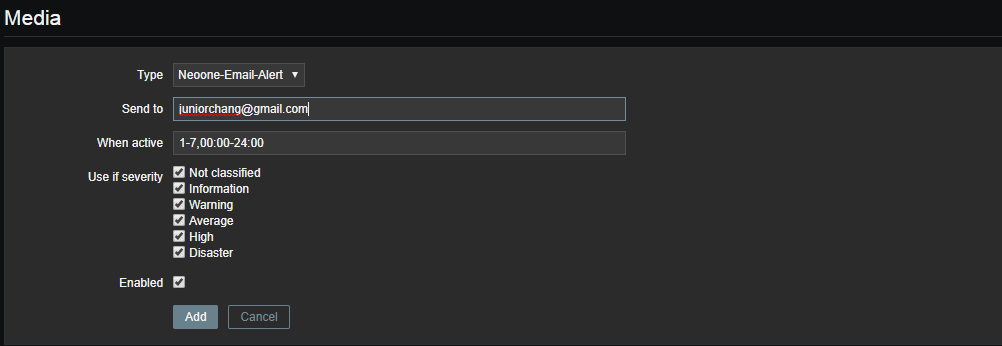
注意!!這邊還需要再點一次update按鈕才會更新!!
到這邊設定都告一段落,就可以試試警報後會不會發出郵件了,記得每個設定新增好後還要在一次確認有沒有新增上去。
參考資料:
https://itw01.com/VO9MEPM.html
https://www.zabbix.com/documentation/3.4/zh/manual/config/notifications/media/script